
AI
Making slideshows for real estate listings is one of the best promotional tactics. Of course, trying to sell a property is not always an easy task to complete. But it’s not impossible if promoted right.
With videos listing your real estate properties, their details, and your contact information, as well as taking people to those places through photos, you will be able to reach more potential buyers. In the end, you might finally sell that space you’ve been trying to sell for years.
Thinking about the whole process of making real estate listing slideshows might be a little scary now, considering you might not have enough time, patience, and ideas. But be prepared to change your mind once you start working on it, and with tools like the online slideshow video maker, Renderforest knows how to do it. Check out the video created with one of our presets to see exactly what we mean.
Ready to start creating your slideshow? Here’s a step-by-step tutorial of how to make a video slideshow for a real estate listing like this and make your offers look phenomenal. Let’s start right away!
You will first need to Sign in to your Renderforest account. If you don’t have an account on our platform, you can always Sign up for free.
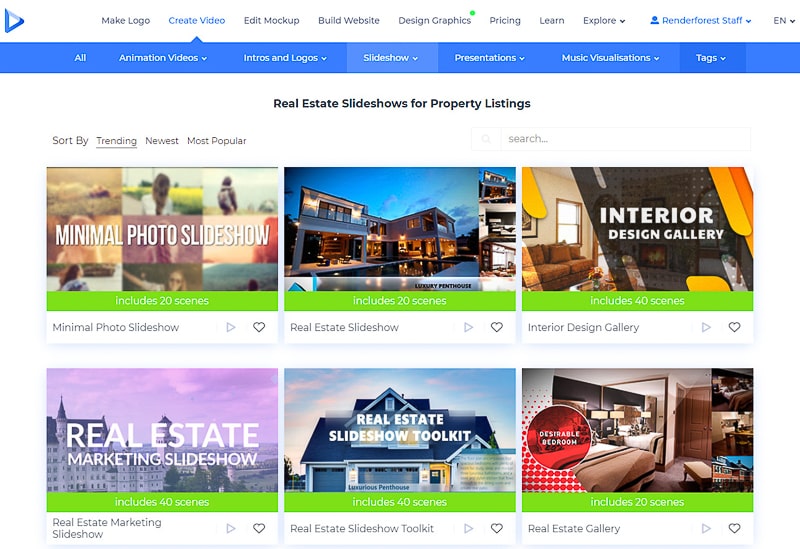
Next, go to the “Create video” section on the main menu, and then click on the “Slideshow” subsection. On the list, choose the “Real Estate Slideshows” option, which will guide you to our growing collection of video templates.
Look through our real estate templates, each of which has its list of presets, to help you make the video quicker. Or you can search the main keywords in the “Search” field, for you to immediately see the related presets and choose one.
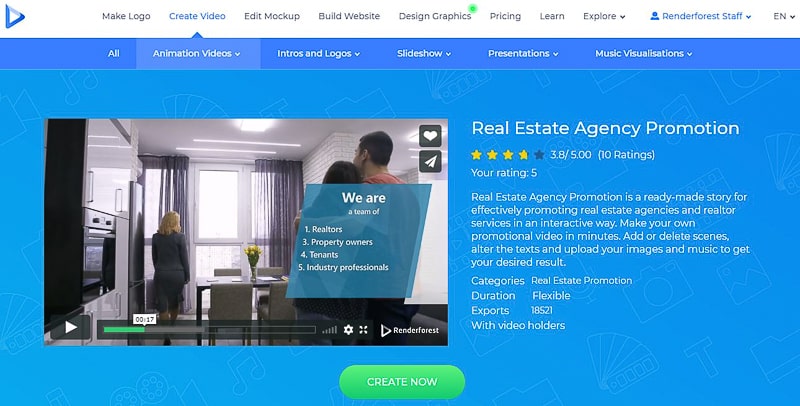
After selecting a preset, click on the “Create now” button, to start right away. For this tutorial, we are going to work with the “Best Real Estate Deals” preset.
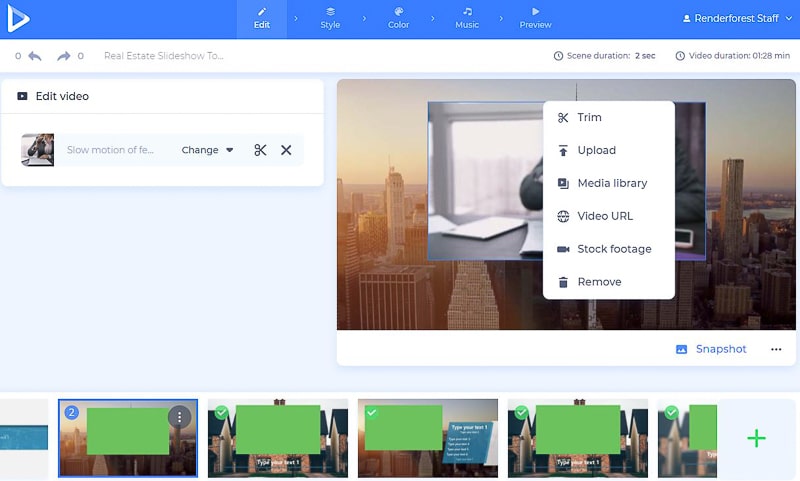
You will then be transferred to your dashboard, where you’ll find already collected scenes waiting for you. This is where you input your text and property details, add your media files, and more. Let’s go through all the steps together.
You might want to start with adding your video and image files. To do so, click on their holders and choose “Upload”. In case you want to select one from your previous uploads, click on the “Media library” option.
To add a video or photo from the web, choose “Video URL” or “Image URL” respectively, and paste the links. The “Stock footage” along with the “Stock image” option, depending on the scene type, will offer you a variety of media from our collection.
If you change your mind after uploading a certain media, don’t stress about it, click on it, press “Remove”, and upload a new one.
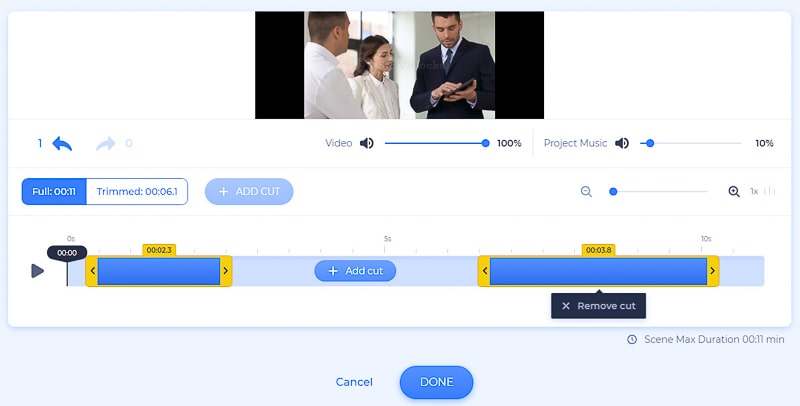
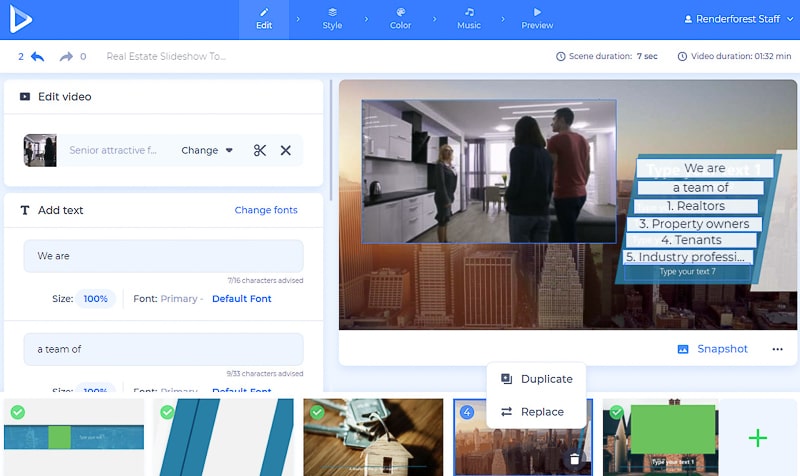
It’ll be helpful to know that you have the option to trim your video files when making the slideshow. This means you won’t need to trim them before the upload, you can do it on the spot, and take the part you need for your real estate listing slideshow.
Right after you add your video with any of these options and click “Insert”, you will be able to trim and split the video to take the exact parts that you want. Click on the “Add cut” button to cut more parts from your video and “Remove cut” if you change your mind.
Here you also have the option to adjust the sound of the uploaded video.
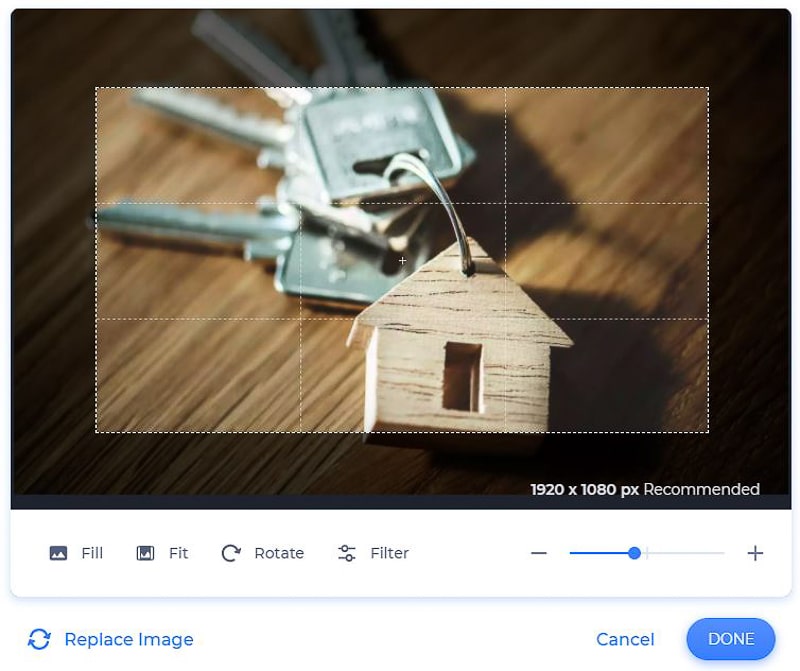
When it comes to image files, they can be cropped and rotated. There are also some photo filters on our platform for you to use when needed.
Next, it’s time for you to list your real estate properties, add your description text and contact info. Click on the text fields, paste or type in your text, before clicking “Save and close”, to change the default text. Add your email, phone number, website, the price of each property, and more.
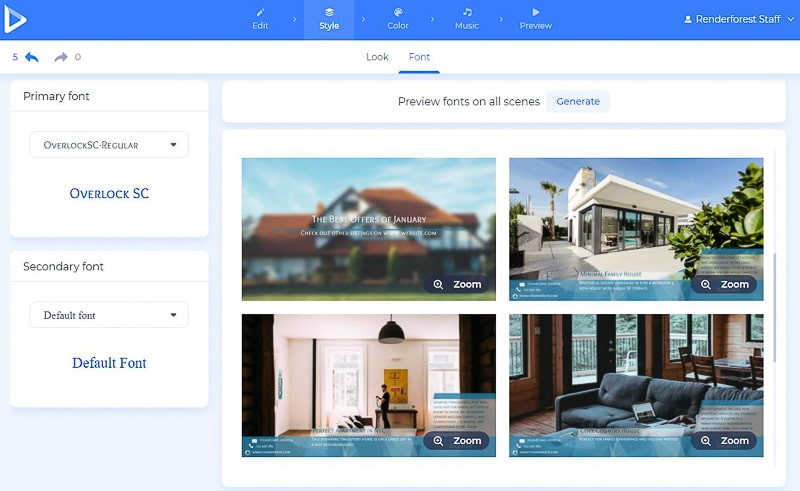
Change the size of the text by clicking on the percentage number under the text field. The font is changeable too, you can do it either individually by clicking on the “Default font” option, or changing the font of all the texts together in the “Font” section (see later, in the “Style” section).

If you have a logo, upload it in the respective scenes by clicking on the image holder. If you don’t have a logo yet, Renderforest will help you create one on the spot. To do so, click on the logo holder and then the “Create logo” option.

Another thing to help you make the real estate listing slideshow you need is the flexibility of the scenes. Move the scenes by dragging them in the timeline, delete them by clicking on the trash box icon, and add new scenes by clicking on the plus icon next to your scenes. You can also duplicate and replace the scenes by clicking on the three-dot menu on every scene.
“Style” section is your next stop. Here, in the “Look” subsection, you will be able to choose the transition style of your preset.

And as mentioned before, the “Font” subsection will help you change the font of your text – both the primary and the secondary ones.
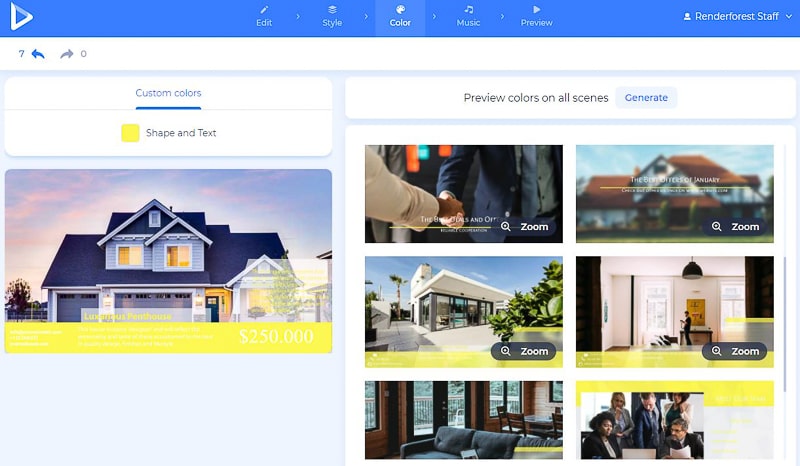
The color palette of your real estate video can also be changed according to your brand colors and style. Choose the shades you need in the “Color” section and click on the “Generate” button to see the changes on your scenes, before saving it.
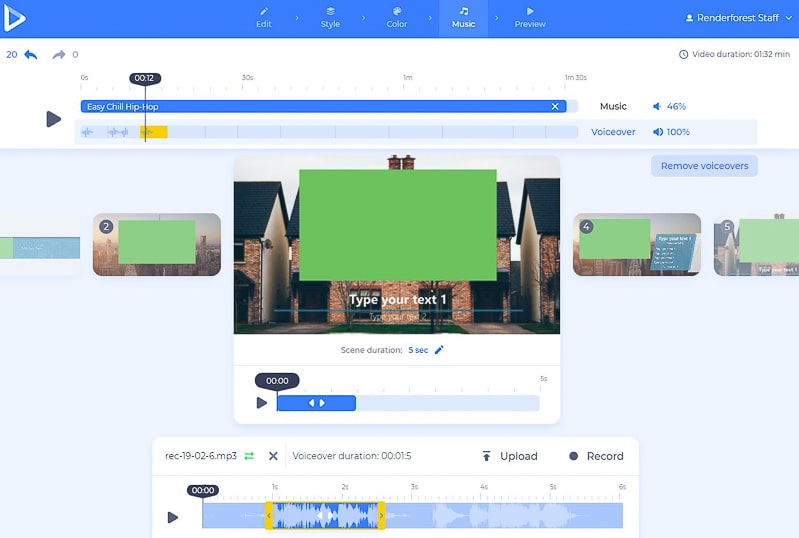
The last step before previewing your slideshow is “Music”. Add a voiceover, telling about the presented properties and your real estate company, just like in ads.
Click on the “Add voiceover” button, to upload or record one. You can edit the voiceover as well – cut it, lower the volume, replace it, or mute it completely. Note that each of the scenes can have a different voiceover.
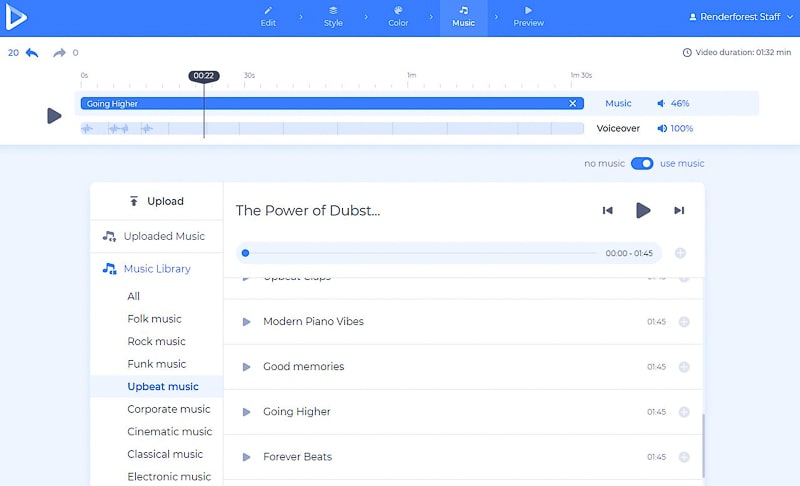
Add a music track as a background to your slideshow by selecting one from our library, uploading from your device, or picking one of your previous uploads.
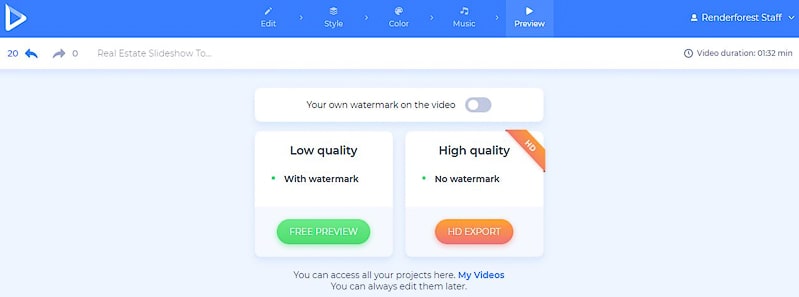
After going back and forth between these steps and making sure the slideshow is ready, it’s time for you to “Preview” the work you’ve done. Once you feel like it’s perfect to be downloaded, choose one of the options to save your video on your device.
There are two options for you to download your video. The first one is the free option, which offers SD360 quality videos with the Renderforest watermark. You will be able to edit, download, and publish your videos whenever you want.
Meanwhile, for the “HD export”, you can choose one of our paid subscriptions and download your video in high-quality and without a watermark. All the details about our pricing are available here.
Your real estate listing slideshow is ready to blow your website and social media accounts.
Here are some other presets and templates to help you make your next real estate listing slideshow. Check them out right away!
Showcase your real estate properties and their details using this bright and modern template. Share the art of business slideshows with your potential customers.
Highlight the best features of your company and the real estate you’re selling, with slideshows that look nothing short of amazing.
Create mesmerizing slideshows to underline the advantages of the real estate you are trying to sell and help people notice your services with minimal effort.
Add your photos and text to create the perfect real estate slideshow. Choose a voiceover or a music track, along with your best shots and videos, and it won’t take much time for the video to be ready. Give it a try today!
Article by: Renderforest Staff
Dive into our Forestblog of exclusive interviews, handy tutorials and interesting articles published every week!
Read all posts by Renderforest Staff

