Case Studies
After launching our iOS app, we received so many requests from Android users. And finally, we are happy to announce that we’ve launched Renderforest Video Maker for Android!
Grab your devices, download the app, and create videos on the go!
With our easy-to-use tools, you can create animated explainer videos, promos, YouTube intros, logo animations, video ads, Insta Stories, educational videos, music videos, visualizers, and so much more.
If you are familiar with our video editor, it will be easy for you to get used to the mobile layout. It’s as intuitive and user-friendly as the browser version. In any case, let’s go step by step to find out how to make animation online.
Let’s go!
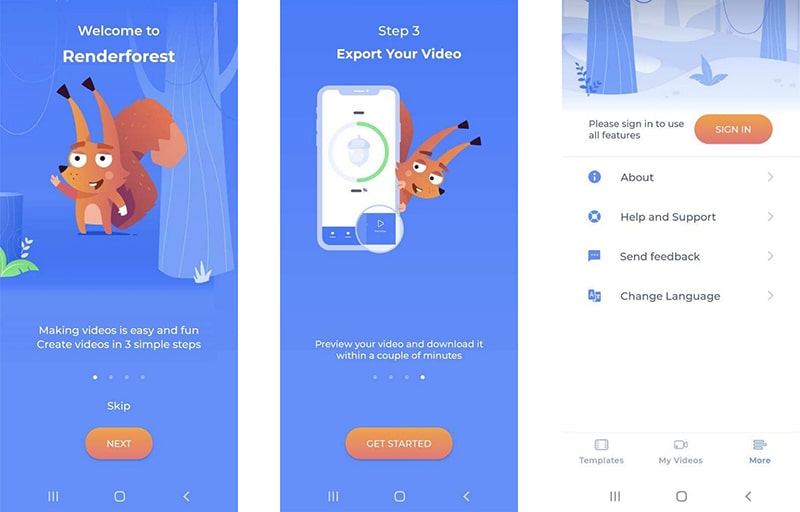
When you open the app, you can go through the 3-step onboarding process by clicking “Next”, or skipping it. Click the “Get started” button to be redirected to our video template library.
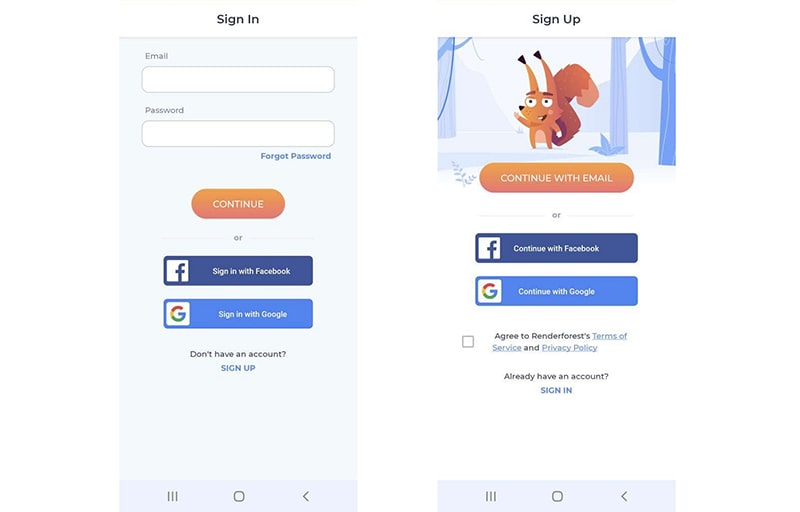
To access the app’s full functionality, sign in to your Renderforest account. Click “More” in the menu below and “Sign In”. All your created projects will be synced, so you can access and edit any of your old projects.
If you don’t have an account, sign up to create one. Click the “Sign Up” button, choose a sign-up option, and complete the required steps.
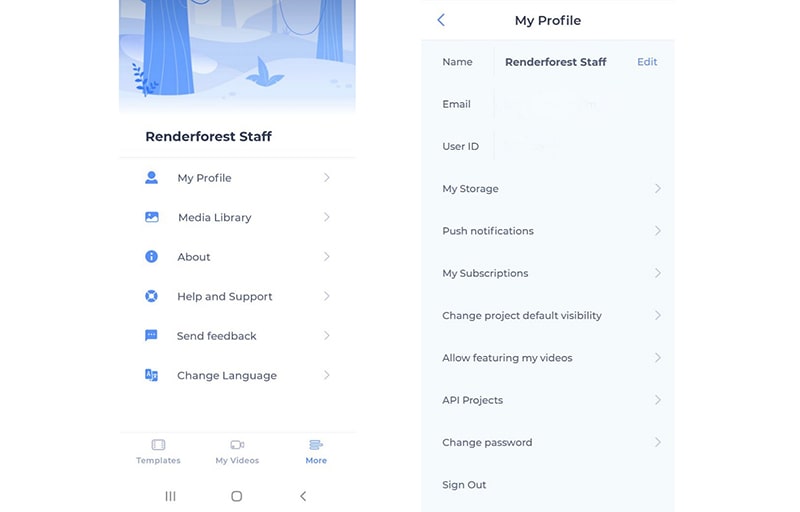
Explore “My Profile” for more information about your account, storage, subscription, video and project settings, personal data, and more.
Now, let’s choose a video template!
As you can see, there are hundreds of options available in our mobile library. To find the most suitable one for your project, check out the main categories including animation templates, intros, slideshows, presentations, and demo videos like mobile app explainer videos. If you still can’t decide which template to choose, click the “+” button below and use our advanced filtering options.

Here, you can select the type of video you want to create and what you want to promote. For example, here we’ve selected “Promotional Video for a Company or Startup”. Click on “Find a Template” to see the suggested ones.
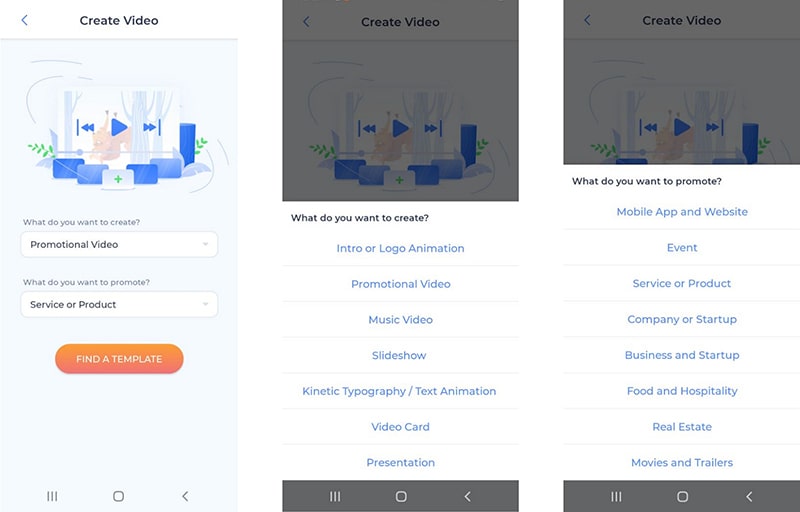
From the suggested templates, click on a template, watch the preview, and click on “Create Now” to start creating your video. We’ve selected the “Trendy Explainer Toolkit”.
Please note that the editing process of other templates may vary a bit from this tutorial.
In the video editor, you have two options: create a video from scratch by adding the scenes manually, or use ready-made stories (presets).

If you choose the first option, you’ll be redirected to the scene library where you can find scenes in dozens of categories: character animation (male, female, children), group animation, office animation, background animation, scenes with image and video holders, logo animation and contact forms, animated icons for different industries, checkmarks and x-marks, kinetic typography, and more. The categories may vary depending on which template you choose.
Find and select the scenes you need for your video and click “Add”. The selected scenes will appear in the timeline, so you can edit, duplicate, rearrange, replace, and delete them.

The second option of video creation is ready-made stories or as we call them – video presets. If you want to save time creating videos, or need some inspiration, check out these stories. You can preview the video and apply if you like the selected scenes. When you click “Use This Preset”, the scenes will appear in your timeline, and you are free to edit and change whatever you want.

Now, let’s see how you can customize the scenes.
Add your text in the text field(s) and change the text size as you like. Also, adjust the scene duration.

To add images to your project, select an image holder scene and edit it. Click on “+ Add image” to see the 4 options of adding images: upload from your device, capture with your device camera, add the image URL, or choose from your Media Library. Then, you can rotate and adjust your image to the scene frame.

The same options are available for adding videos. Select a scene with a video holder and add your file/video.

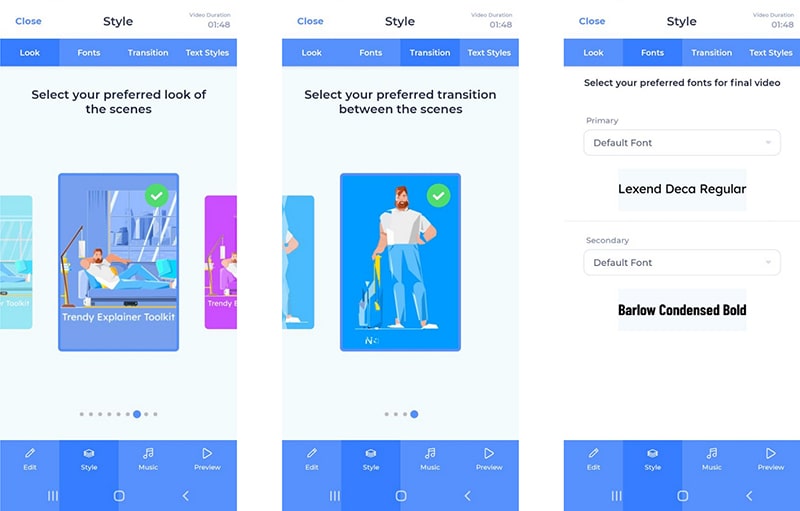
Access the “Style” section from the menu below to find and choose the looks, fonts, and transitions available in that template. Some templates have a “Color” section where you can choose color combinations suitable to your project. Or, if you have brand colors, add them in the “Custom Colors” tab.
To complete your project, go to the “Music” section. Here, you can add background music and a voiceover. You can choose a music track from our Music Library, or upload it from your device. Our app gives you an option to record a voice-over with your device right in the editor and add it to the scenes. Besides, you can use our text-to-speech option to generate one or select a file from your documents.
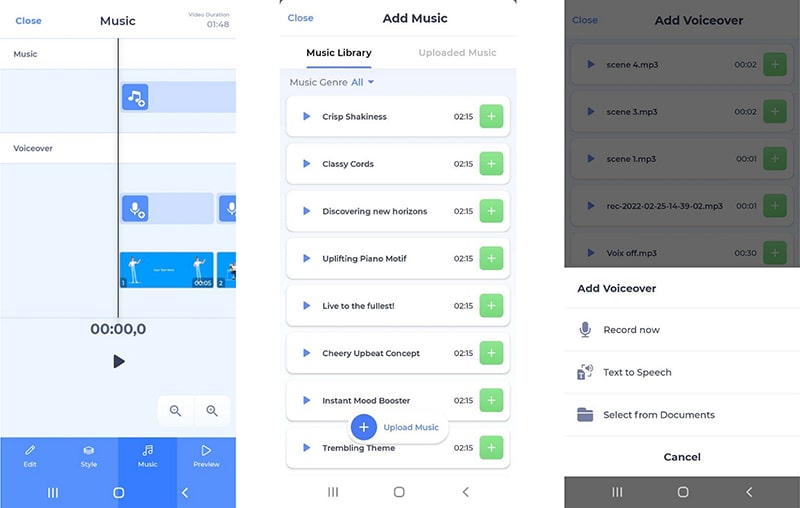
With our text-to-speech feature, you can customize and generate a new voiceover. Add your text, select the language, and choose between female and male voices. You can also change the speed of your voiceover if needed. Once you adjust all the settings, click on “Generate” and “Done”. Write down the title of your voiceover and save it.

Make sure that your project is ready and go to the “Preview” section to view the result and export your video․ Select the “Free Preview” and check if there are any changes to make in the project or not.

When the video is final, export it in high quality. All your projects are automatically saved in “My Videos” which can be accessed from the main menu.

If you have any questions, you can always contact our 24/7 support team, or find answers in our “Help and Support” section.

Enjoy the easy video creation process with Renderforest Video Maker app for Android. Download the app and give it a try today!
Article by: Renderforest Staff
Dive into our Forestblog of exclusive interviews, handy tutorials and interesting articles published every week!
Read all posts by Renderforest Staff

